7. March 2024 By Doruk Suzer
Becoming the Maestro: An Introduction to Maestro, the Mobile UI Testing Framework
Introduction
As technology advances and its progress is measured in leaps rather than steps, the need for better and more capable tools for testing arises.
Mobile devices have become not just tools but extensions of ourselves. As our smartphones grow smarter, sleeker, and more sophisticated, the demand for flawless mobile applications has never been higher. To assure the quality of these applications, we, as testers, need tools that are:
- Robust: Able to handle a wide range of scenarios and testing requirements effectively.
- Intuitive: User-friendly and easy to navigate, ensuring a seamless experience for testers.
- Scalable: Capable of handling testing demands across various devices, platforms, and screen sizes.
- Flexible: Accommodates changes in the application or testing requirements without significant disruptions.
- Automated: Capable of executing repetitive tasks with minimal manual intervention, enhancing efficiency.
- Adaptive: Adjusts to evolving technology trends and updates, ensuring ongoing relevance.
- Transparent: Provides clear insights into test results, facilitating easy identification and resolution of issues.
- Cross-platform: Capable of testing applications across various operating systems and device types.
Here, Maestro comes into play.

What is Maestro?
Maestro (developed by mobile.dev) makes it simple to define and test the Flows and is based on the knowledge gained from its predecessors like Appium, Espresso, UIAutomator, and XCTest.
Consider Flows as components of the app’s user journey. Some examples of these Flows that may be defined and tested are Login, Add to Cart, and Checkout.
Some of the key features of Maestro, as stated by them, are:
- Built-in tolerance to flakiness. UI elements will not always be where you expect them, and screen taps will not always go through, etc. Maestro embraces the instability of mobile applications and devices and tries to counter it.
- Built-in tolerance to delays. No need to pepper your tests with sleep() calls. Maestro knows that it might take time to load the content (i.e., over the network) and automatically waits for it (but no longer than required).
- Blazingly fast iteration. Tests are interpreted, no need to compile anything. Maestro is able to continuously monitor your test files and rerun them as they change.
- Declarative yet powerful syntax. Define your tests in a YAML file.
- Simple setup. Maestro is a single binary that works anywhere.
UI Test Automation Using Maestro
For demonstrating UI test automation using Maestro, the mobile application of Wikipedia is chosen. Here is a Flow to look at the picture of the day on Wikipedia.
The Flow can be written in a YAML file; the syntax is user-friendly. The YAML file of the Flow is shown below:
	appId: org.wikimedia.wikipedia
	---
	- runFlow: subflows/skipIntro.yaml
	- assertVisible: "Wikipedia"
	- assertVisible: "Today"
	- scrollUntilVisible
	    centerElement: true
	    element:
	      text: "Picture of the day
	- assertVisible: "Picture of the day"
	- tapOn: "Picture of the day"
	- tapOn: "Close"
	- tapOn:
	    point: 37%,3%
	- assertVisible: "Wikipedia"
	- assertVisible: "Today"
Flows can be represented as blocks; these can be used and re-used at different times and situations using the runFlow command. This way, duplicate steps can be avoided in Flows. Another great example of this would be a Login Flow.
	appId: com.example.app
	---
	- launchApp
	- tapOn: Username
	- inputText: Test User
	- tapOn: Password
	- inputText: Test Password
	- tapOn: Login
Also, arguments can be defined that will be passed with the Flow:
	runFlow:
	file: loginFlow.yaml
	env:
	MY_PARAMETER: "123abc"
In our example, there is a subflow called “skipIntro”, since we start the application with a clear state, the application triggers the onboarding steps. This subflow is created to skip these steps.
Another great example would be the testing of the “Search” functionality of the application. Here is the YAML file and the recording of the Flow:
	appId: org.wikimedia.wikipedia
	---
	- runFlow: subflows/skipIntro.yaml
	- tapOn: "Search Wikipedia"
	- inputText: "Test automation"
	- tapOn:
	    text: "Test automation"
	    index: 1
	- assertVisible: "Test automation"
	- scrollUntilVisible:
	    centerElement: true
	    element:
	      text: "Model-based testing"
	- tapOn:
	    point: 37%,3%
	- tapOn: "W"
	- assertVisible: "Wikipedia"
	- assertVisible: "Today"
runFlow can also be used conditionally, but Maestro discourages the usage of conditional statements unless necessary as they could easily increase the complexity of the tests.
	- runFlow:
	    when:
	      visible: A Text
	    file: {reference to another yaml file}
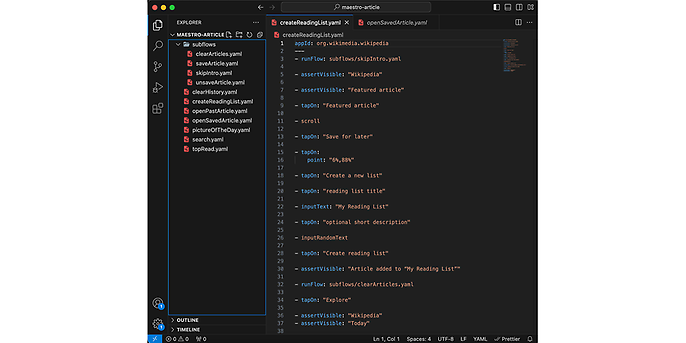
Another example Flow to create a reading list:
A simple project could look like this, subflows categorized into a folder for better maintainability. The tests can be written as a YAML file, which makes it easier for readability.
Maestro Studio
Maestro also has a co-pilot to create Flows called “Maestro Studio”. It enables users to visually select a UI element and also makes suggestions regarding next steps. It is built right into the Maestro CLI; simply run the command:
maestro studio
Integration into CI
Maestro Cloud is a simple way to run the Flows in CI. Since the Flows run in the cloud, there’s no need to configure any simulators or emulators.
Maestro Cloud can be integrated into any CI platform via the Maestro CLI; most common platforms like GitHub Actions, Bitrise, Bitbucket, CircleCI, and GitLab CI/CD have native integrations.
Also, the supported platforms are iOS, Android, React Native, and Flutter.
After installing the CLI, just login and upload the created Flows.
maestro cloud <appBinary> <flowFile>
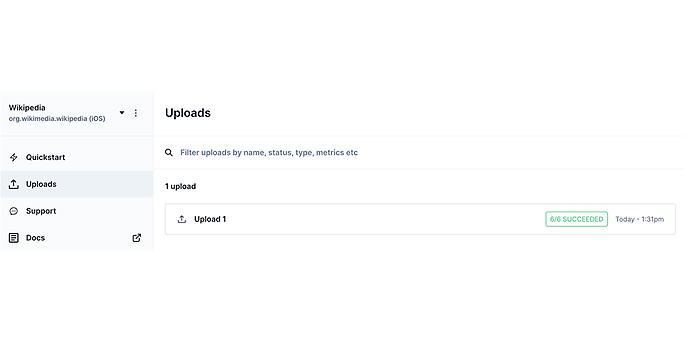
After running this command, the Flows get uploaded and analyzed.
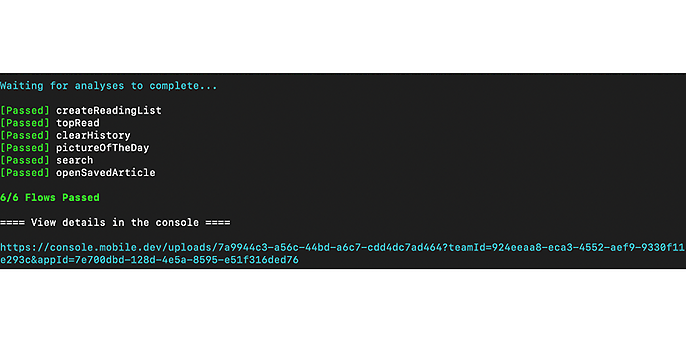
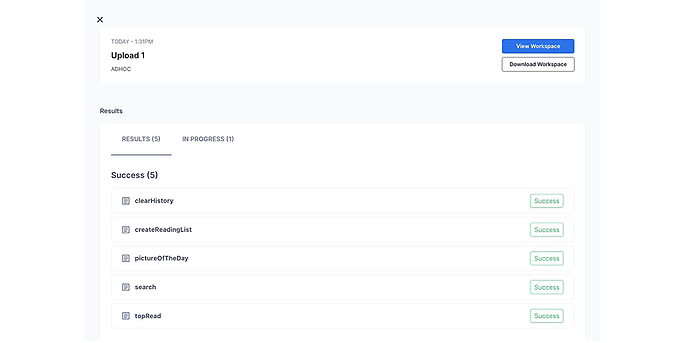
The Flows get uploaded from the selected location, analyzed, and recorded. Selecting one of the results will open the Flow Details section.
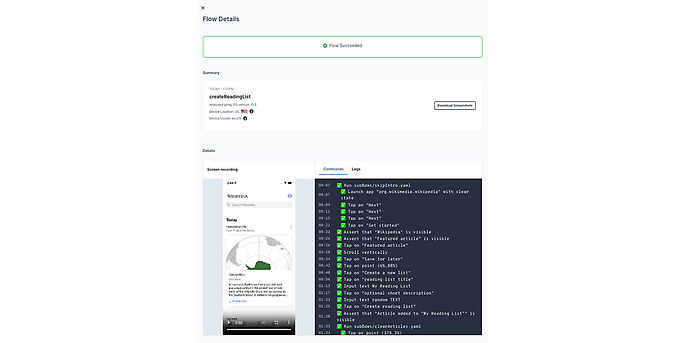
In the details screen recording of the selected test case, commands and logs can be viewed. This will help to pin-point the exact problem and location if something goes south.
Maestro can be installed on the CI, and a step can be added to make an upload of the app and Flows using the maestro cloud command.
maestro cloud --apiKey <...> <appFile> .maestro/
Then the CI flow can be triggered and the results can be seen in the console.
For certain types of regressions, mobile.dev needs to compare results against a Baseline Branch. If specified, Maestro will compare the results of every run with this branch to find out the differences.
Furthermore, on every pull request, an upload can be triggered to fully automate the regression process.
Conclusion
Maestro is a tool that constantly develops and brings innovations. They have a community on Slack where they respond to questions quickly. They add sensible ideas to their backlogs and publish them as features in the future. It’s a great feeling to see your suggestion added to the tool. :)
So far, I’ve had a great experience with Maestro. It is a great tool to have if you are testing mobile applications. I had only minor issues, which were solved quickly through the community. Maestro has a smooth learning curve and is fairly easy to use.
In my experience, this tool would bring so much value to some of my past projects, since the automated tests would cut the regression testing duration by a lot.
I will definitely be following Maestro’s development closely.
